Version 9.0.2
Part Number A90879-02
Home | Solution Area | Contents |
Index |
| Oracle9iAS Discoverer Plus User's Guide Version 9.0.2 Part Number A90879-02 |
|
This chapter explains how to use Discoverer workbooks and worksheets, and contains the following topics:
Workbooks are Discoverer files that contain worksheets displaying data retrieved from the database.
If you are familiar with spreadsheet applications (e.g. Microsoft Excel), think of a workbook as a spreadsheet file.
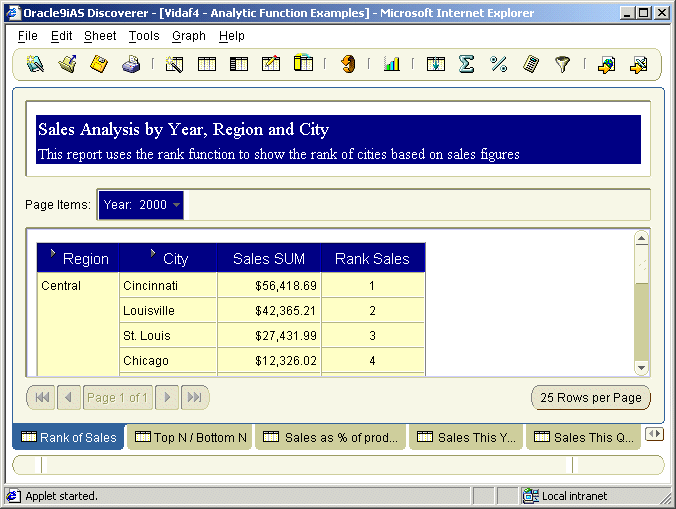
Workbooks typically contain data that is related in some way but organized to show different perspectives. For example, you might want to analyze different aspects of sales performance and create different worksheets for each aspect. For example (see figure below):
You use workbooks in the following ways:
Worksheets contain the data that you want to analyze, together with a number of Discoverer components to help you analyze the data. For example, a worksheet can contain parameters, totals, percentages, exceptions, and calculations.
You create a worksheet in a workbook (for more information, see "What are workbooks?").
If you are familiar with spreadsheet applications (e.g. Microsoft Excel), think of a workbook as a spreadsheet file and worksheets as different sheets in that spreadsheet file.
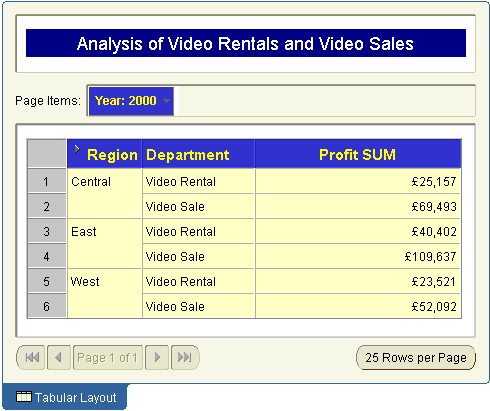
In the figure below, a Discoverer worksheet called Tabular Layout contains information about profits made by two departments across three regions in the year 2000.
You can develop worksheets in different ways:
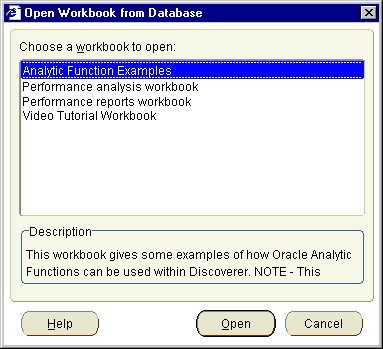
You can open a workbook that you have saved in the database. You can also open workbooks that other users have saved in the database and have shared with you.
To open a workbook:
When you start Discoverer, the "Workbook Wizard: Create/Open Workbook dialog (Open)" is displayed.
Hint: If you have already started Discoverer, do the following:
The extra options Database and Scheduled are displayed.
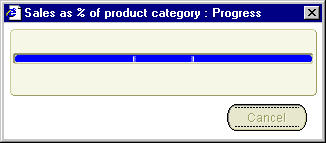
Discoverer first evaluates the workbook to determine how long it will take to open the first worksheet. Depending on how Discoverer is configured, a progress dialog shows you the time estimate for loading the first sheet.
For more information about configuring Discoverer, see "Options dialog: Query Governor tab".
The workbook and the first worksheet are displayed. If the workbook contains more than one worksheet, the worksheets are displayed as tabs along the bottom of the Discoverer window.
Now you are ready to begin analyzing data using Discoverer!
For example, you might click No if the data that you want is not in the first worksheet, but is in another worksheet. Click that other worksheet's tab at the bottom of the window.
If you click No, you can always run the query for the first worksheet at a later time by choosing Sheet | Refresh Sheet.
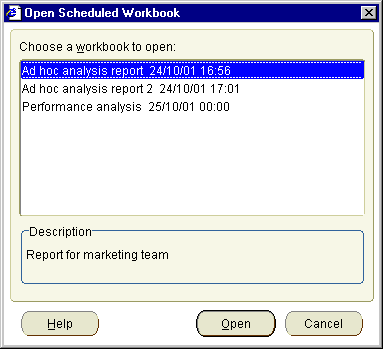
You can open a workbook that you have scheduled in the database. You can also open workbooks that other users have scheduled in the database and have shared with you (for more information, see "What are scheduled workbooks?").
To open a scheduled workbook:
When you start Discoverer, the "Workbook Wizard: Create/Open Workbook dialog (Open)" is displayed.
Hint: If you have already started Discoverer, do the following:
The extra options Database and Scheduled are displayed.
Now you are ready to begin analyzing data using Discoverer!
For more information about using Discoverer as an Oracle Applications user, see "How to start Discoverer in Oracle Applications mode using an existing connection".
You edit a workbook when you want to update the workbook's worksheets, or change the workbook's properties. For example, you might want to add or remove worksheets, or share the workbook with other Discoverer users.
To edit a workbook:
Discoverer updates the workbook as you specified.
Before you can save a workbook to the database, the Discoverer manager must have given you permission to do so. The Discoverer manager gives you permission to save workbooks to the database by granting you a Discoverer privilege. Provided that you have this privilege, you can:
Contact the Discoverer manager to find out what type of privileges you have to save workbooks (for more information about giving access privileges to other Discoverer users, see "About sharing workbooks").
When you save a workbook, you save it in the database. Before you can save it to the database, the Discoverer manager must have given you permission to do so. For more information about saving workbooks to the database, see "About saving workbooks to the database".
To save changes to a workbook and keep the workbook open:
To save changes to a workbook and close the workbook:
If you have not made changes to any worksheet in the workbook, the workbook closes. If the workbook contains unsaved changes on any worksheet, a prompt reminds you to save the changes.
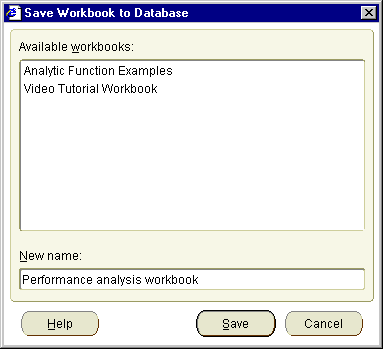
To save the workbook under a new workbook name and keep the workbook open:
You can enter a name that:
Changes to the workbook made since the workbook was last saved are saved to the database under the new workbook name. The worksheet remains open. The original workbook remains in the database.
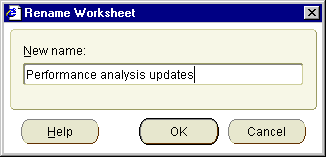
You rename a worksheet when you want to change the name displayed in the worksheet tab. For example, you might want to change the default worksheet name created by Discoverer to something more meaningful.
To rename a workbook:
To rename a worksheet:
The worksheet's new name appears on the worksheet's tab at the bottom of the worksheet.
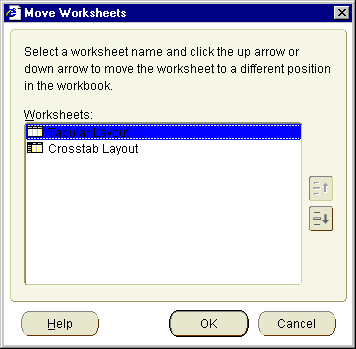
You re-order worksheets within a workbook when you want to change the order that worksheets appear in the workbook. For example, you might want to put the most commonly used worksheet at the front of a workbook to access information more easily.
How to re-order worksheets in a workbook:
The worksheets are now arranged in the order that you specified.
Data in a workbook appears as the result of querying the database at a particular time. If you have had a workbook open for a while, the data in the workbook might be out-of-date. You refresh a worksheet when you want to make sure that you are accessing the most recent information. When you refresh a worksheet, Discoverer re-queries the database.
Discoverer displays up-to-date data in the worksheet.
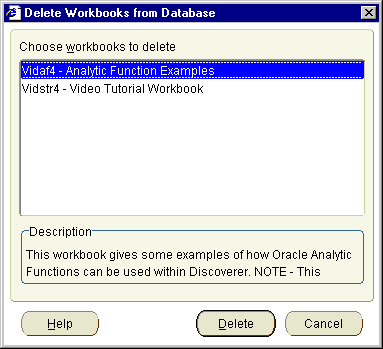
You delete a workbook when you no longer want to use the workbook, and want to remove it permanently from the database. Before deleting old workbooks, make sure that no other Discoverer users want to use the workbook in the future.
To delete a workbook from the database:
The selected workbook is permanently removed from the database.
In some organizations, the Discoverer manager or an experienced Discoverer user creates the workbooks required by Discoverer users. In other organizations, individual users create their own workbooks.
Typically, you create a new workbook when you want to analyze data in a new way. For example, you might want to create a performance analysis workbook that you will make available to all sales analysts in a marketing department.
Before you can create a new workbook, the Discoverer manager must have given you permission to do so. The Discoverer manager gives you permission to create a new workbook by granting you a Discoverer privilege.
You use the Workbook Wizard to guide you when you create worksheets in a workbook. Discoverer uses the following icons in the Workbook Wizard and Worksheet Wizard:
| Icon | Description |
|---|---|
|
Business area - a business area created by the Discoverer manager. To select another business area for the new worksheet, click the drop-down arrow and select from the list of business areas. A business area contains one or more folders. |
|
|
Folder - a related set of items that you can select for your worksheets. Click the plus (+) and minus (-) symbol next to the folder to open and close the folder. |
|
|
Axis Item - a column on a table or a level on a crosstab axis. Axis items remain constant and have relatively few unique values (e.g. the names of departments in your organization, the names of your Sales Regions). The values of an axis item are shown as a list of values (LOV). |
|
|
Item Value - an item in a list of values (LOV). |
|
|
Numeric Item - a numeric item. The values of numeric items can change as you analyze the data (e.g. summing profits will produce different results for cities than for regions). Numeric items behave as axis items on table worksheets and correspond to the data in the body of a crosstab. |
|
|
Aggregation - a mathematical function for aggregating data. For text items (e.g. Region), the typical aggregations are Count, Max, and Min. For example, you can count the number of Regions items, or find the highest or lowest (where A might be the highest and Z the lowest). For numeric items, typical aggregations are Sum, Count, Max, Min, Average, and Detail. For example, you can find the Sum or Average of the numeric data. The default aggregation (specified by the Discoverer manager) is displayed in bold. |
|
|
Condition - a filter for finding specific data. Note: Conditions defined by the Discoverer manager appear in folders. User-defined conditions do not appear in folders. |
|
|
Calculation - a mathematical expression to produce new data from other items. Note: Calculations defined by the Discoverer manager appear in folders. User-defined calculations do not appear in folders. |
|
|
Find - use this icon to display the "Find dialog (in Item Navigator)", which enables you to quickly locate items in business areas. |
While working with Discoverer, you might want to create a new workbook and one or more worksheets. You can then use the new workbook yourself and distribute it to other Discoverer users.
When you create a new workbook, Discoverer immediately prompts you to create a new worksheet to go into the workbook.
To create a new workbook:
When you start Discoverer, the "Workbook Wizard: Create/Open Workbook dialog (Open)" is displayed.
Hint: If you have already started Discoverer, choose File | New to display the "Workbook Wizard: Create/Open Workbook dialog (New)" and skip the next step.
The extra options How do you want to display information? are displayed, which enable you to specify a worksheet style for the first worksheet in the new workbook (e.g. table, crosstab).
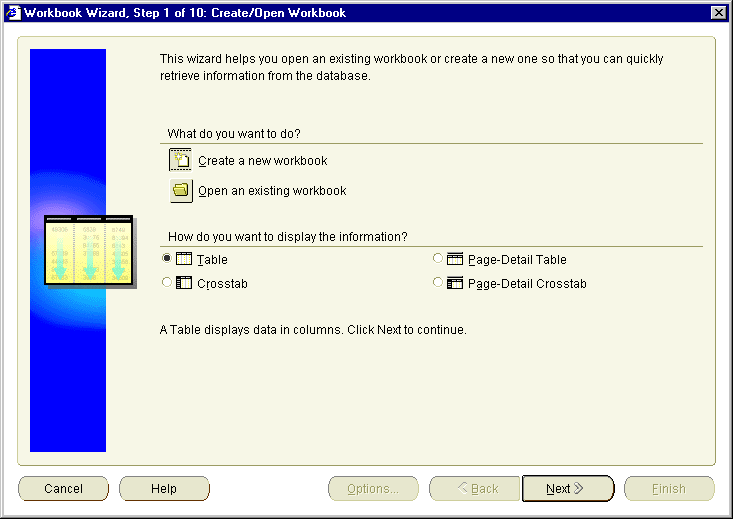
For more information about worksheet layouts available, see "About the four types of Discoverer worksheet".
Text description of the illustration ww_2.gif
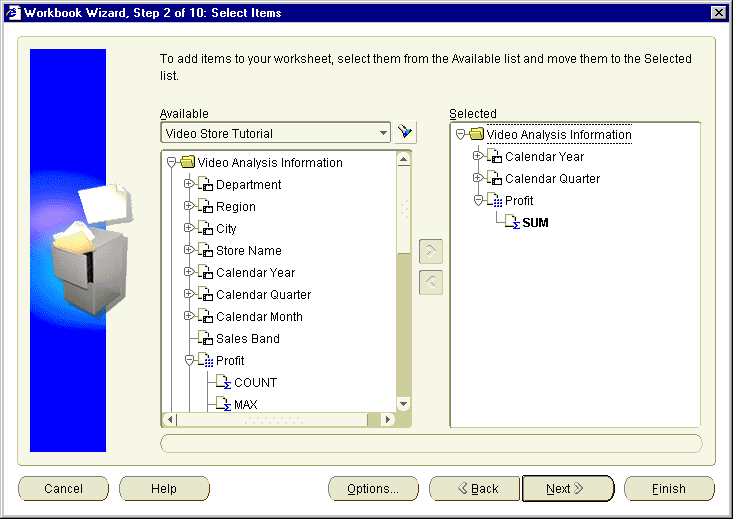
You use the Select Items page to select what data to display on the worksheet.
The folders and items in the business area you selected appear beneath the business area name.
Hint: Click the torch icon (
 ) above the Available box to display the "Find dialog (in Item Navigator)", where you search the EUL for items that you want to add to the worksheet.
Hint: Folders containing items available to the current worksheet are active. Items not available to the current worksheet are grayed out.
Hints:
Having specified the folders and items to include in the worksheet, you can add other features to the worksheet or close the Workbook Wizard to start analyzing the worksheet data.
Hint: You can change selections you made on previous pages by clicking the Back button.
Now you are ready to begin analyzing data using Discoverer!
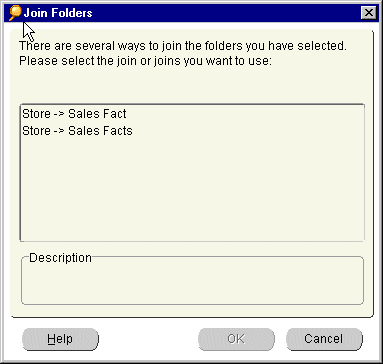
Contact the Discoverer manager for more information about multiple join paths, or see "About multiple join paths".
In the figure below, the Join Folders dialog is displayed when Discoverer detects a multiple join path. In this instance, the Store item can be associated with the Sales Fact folder or the Sales Facts folder. The Please select the join or joins that you want to use list contains an entry for each of these options.
You add a worksheet to a workbook when you want to analyze data in a new way. For example, you might have a web traffic analysis workbook to which you want to add a new worksheet on click-stream analysis.
You can add a worksheet in two ways:
To create a new worksheet from the beginning:
The new worksheet is added to the workbook.
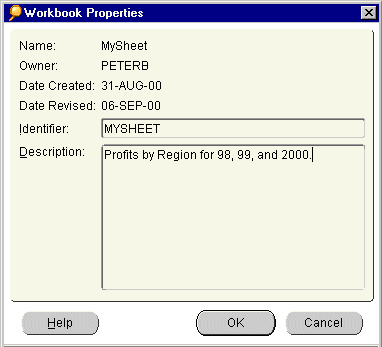
A workbook's properties provide basic information about the workbook. For example, you might want to find out the name of the workbook owner. Or, you might want to find out the date that the workbook was revised so that you can compare it with another workbook.
To view a workbook's properties:
The "Workbook Properties dialog" displays information about the workbook. You can enter additional information about the workbook in the Description box.
If your organization uses non-Oracle databases, the Discoverer manager can set up Discoverer to open workbooks in those databases. You can then use Discoverer to get the data you want. However, depending on the type of database, you might not be able to use all of the data access and analysis features available with Oracle databases. For more information, contact the Discoverer manager.
|
|
 Copyright © 2002 Oracle Corporation. All Rights Reserved. |
|