Version 9.0.2
Part Number A90879-02
Home | Solution Area | Contents |
Index |
| Oracle9iAS Discoverer Plus User's Guide Version 9.0.2 Part Number A90879-02 |
|
This chapter introduces the main dialogs that you will work with when you use Discoverer, and includes the following topics:
Note: The examples in this chapter use the sample Video Tutorial Workbook that comes with Discoverer. The specific tables, charts, data, and other items you see on your screen depend on the actual data in your database, and the workbook(s) designed by your organization's Discoverer manager.
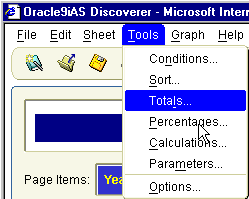
Discoverer provides you with a standard menu bar and toolbar. Each menu selection provides you with a dialog or Wizard to help you perform a task. The figure below shows the Tools menu.
The toolbar contains icons for the most common menu options (e.g. Save, Print, Refresh, Edit Worksheet, Sort). As you become more familiar with Discoverer, you can use the toolbar instead of the menu bar to choose options.

You can also use the Discoverer Graph toolbar to easily edit graph components (see figure above).
The workbook window is where you will do most of your analysis work with Discoverer. The workbook window displays the data in the workbook. Discoverer's navigation facilities make it easy to find your way around workbooks and worksheets to find the information you want.
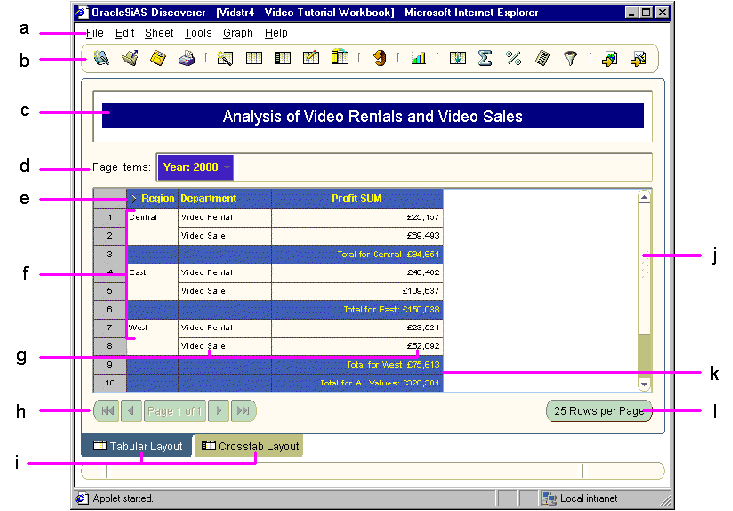
Key to figure:
To help you use Discoverer, tool tips are displayed when you move the cursor over tool bar options. Additional information on tool bar options is also displayed at the bottom of the workbook window.
The figure below shows the tool tip for a condition item and also shows where additional information is displayed at the bottom of the workbook.
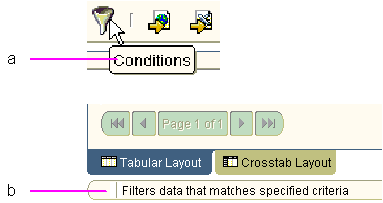
Key to figure:
Axis items are items that appear in the workbook window in:
Typically, axis items have a relatively few, discrete values. You use axis items to identify particular data values.
For example, if a crosstab worksheet shows sales figures, it might include Year as the top axis and Region as the left axis. You can then use the axis items to see the sales of a particular region in a particular year. In the figure below, Department item is on the page axis, Year is on the top axis, and Region is on the left axis.
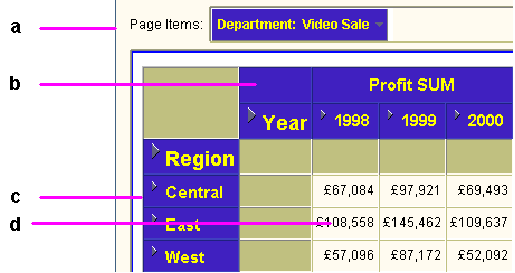
Key to figure:
Data points on a worksheet are the data in the body of a worksheet. Data points are the data that you want to use for analysis purposes or to see listed on a table. Typically:
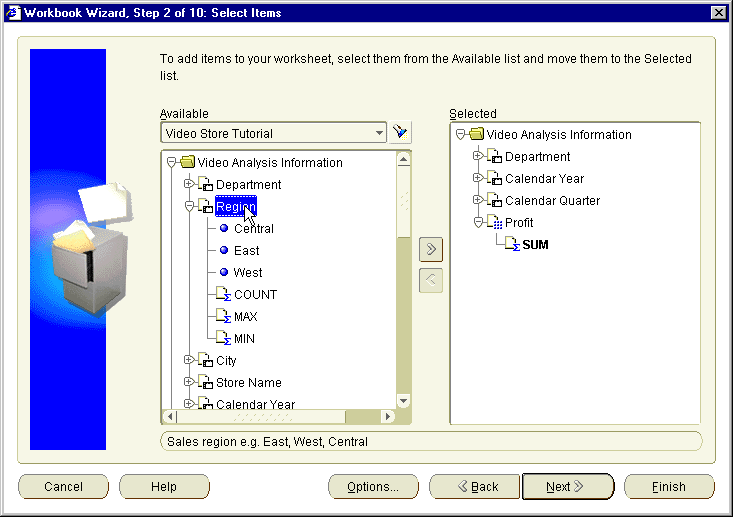
Discoverer's Workbook Wizard enables you to easily create and configure workbooks and worksheets.
Whenever you create a new worksheet, the Workbook Wizard walks you through the steps necessary to get data from the database. Simply click the folder or item you want in the worksheet then drag it to the Selected column.
|
|
 Copyright © 2002 Oracle Corporation. All Rights Reserved. |
|