5
Using Procedures in iStudio
This chapter describes using iStudio to create, invoke, and implement procedures. This chapter discusses the following topics:
Using Procedures
A procedure is an integration point used to model the Request/Reply paradigm. This is a modeling paradigm only, no actual procedures are called. An application can either invoke a procedure to model sending a request and receiving a reply, or implement a procedure to model receiving a request and sending a reply. Similar to events, a procedure has associated data. While an event is only associated with one data set, a procedure has two data sets--one for the request or IN data and one for the reply or OUT data.
For example, if a Get_Address procedure is defined so that the request contains the social security number, SSN, for a person and the reply contains the address in four fields--Street, City, Zip, State, then the procedure is defined as follows:
get Address Procedure
SSN IN
Street OUT
City OUT
Zip OUT
State OUT
Procedures can be used to implement both synchronous and asynchronous Request/Reply.
Note:
Standard application-independent definitions can be used for procedure-associated data in the common view such as Open Applications Group XML business object definitions.
|
Creating a Procedure
To create a procedure:
- From the File menu, select New, then select Procedure. The Create Procedure dialog displays:

Text description of the illustration createproc.gif
Enter information in the following fields:
- Business Object Name--The name of the category to which the procedure belongs. Select from the drop down list.
- Procedure Name--The name of the procedure. Only alphanumeric characters can be used.
- OAI/V1--The owner and version number of the procedure. This field cannot be edited.
- Add or import attributes to this procedure.
- Click Save.
Invoking and Implementing a Procedure
An adapter can activate a procedure which is developed by a user or provided as part of an adapter package, as part of the processing of an integration event or common view.
A common view procedure is an event that can be invoked or implemented through the use of a request/reply paradigm, also know as synchronous invokation. The procedure is modeled as an integration business event with the parameter for the invokation and return of the result once the procedure has been executed.
The following example describes how to model an integration event or common view as a procedure.
Invoking a Procedure
Invoking a procedure in iStudio involves using the Invoke Wizard. To start the Invoke Wizard:
- In the Design Navigation tree, expand the Application node. Select and expand the Application node to display the Invoked Procedures leaf. Right-click Invoke Procedures and select Invoke. The Invoke Wizard displays:
Text description of the illustration is09.gif
- Use this page to enter information for the following fields:
- Application--The name of the application invoking the procedure. Select an application from the drop down list.
- Message Type--This field specifies the mode of communication between Oracle9iAS InterConnect and the application. Select from the following message types:
-
Database--Oracle9iAS InterConnect communicates with the application using the database.
-
Generic--Oracle9iAS InterConnect communicates with the application using a user-defined bridge.
-
XML--Oracle9iAS InterConnect communicates with the application using XML data described through a DTD using the FTP, SMTP, HTTP, MQ Series, or user-defined adapters.
-
AQ--Oracle9iAS InterConnect communicates with the application through Oracle Advanced Queues using the Advanced Queue adapter. The payload can be Oracle Objects where fields may be XML or RAW XML.
-
D3L--The adapter communicates with the application using D3L.
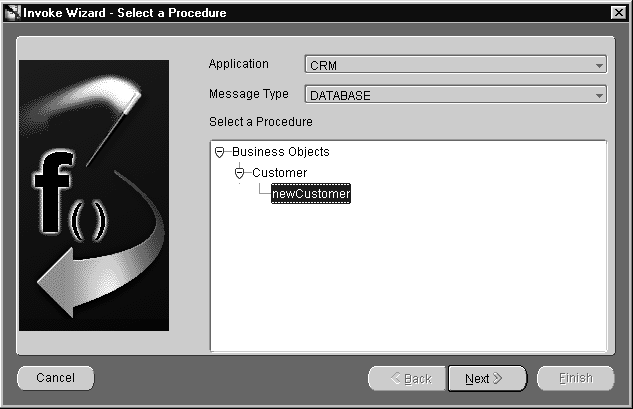
- Select the procedure to invoke in the Select a Procedure box.
- Click Next.
- Define Application View Page
After clicking Next on the Select a Procedure page, the Define Application View page displays:

Text description of the illustration is10.gif
Once a procedure is selected to invoke, the application view is defined. The application view page is initially an empty table. Define the attributes using Add or import the definitions from a database or an API Repository using Import.
- Add or import attributes by clicking Add or Import.
- Check the Synchronous box if this is a synchronous invoke. For example, if the request will block until a reply is recieved.
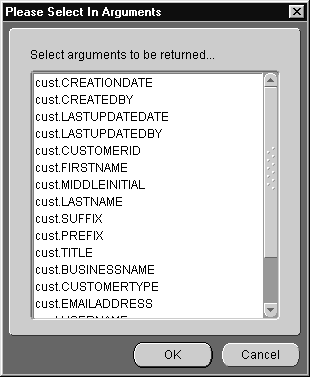
- To specify IN arguments to be returned, click Returned In Args. The Please Select In Arguments dialog displays:
Text description of the illustration is11.gif
- Select the input and output arguments to be returned. Use the left mouse button to select multiple arguments. Only non user-defined input arguments are shown for selection.
- Click OK to return to the Define Application View page.
- Click Next.
- Define Mapping IN Arguments Page
Mapping arguments involves copying the individual fields or simple shape-change transformations. After clicking Next on the Define Application View page, the Define Mapping IN Arguments page displays:
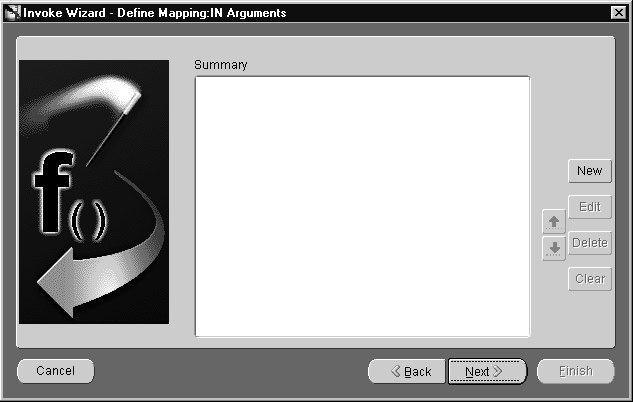
Text description of the illustration is12.gif
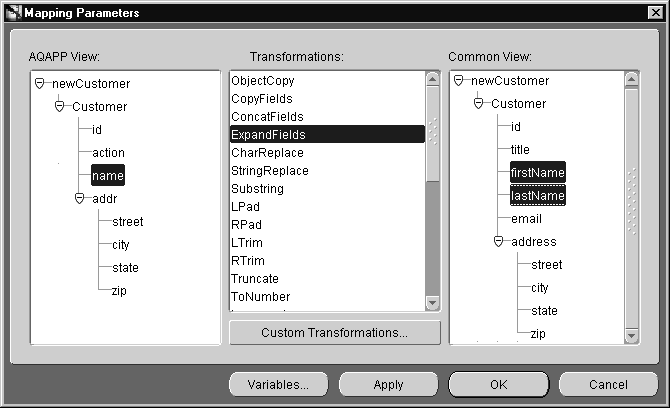
- Click New to define mappings. The Mapping Parameters page displays:
Text description of the illustration is34.gif
To map fields in the application view to fields in the common view, use a transform. For example, to map fields in the FirstName and LastName in the common view to Name in the application view, use the ExpandFields transform.
The following steps illustrate this example:
- Select fields to map from in the application view. Use the left mouse button to select multiple fields in a view.
- Select the transformation, for example,
ExpandFields.
- Select the fields to map to in the common view. Use the left mouse button to select multiple fields in a view.
- Click Apply to confirm selection and continue specifying additional mappings.
- When all mappings have been made, click OK.
The transformation may have parameters. If the Apply button is clicked, the Mapping Parameters dialog displays:
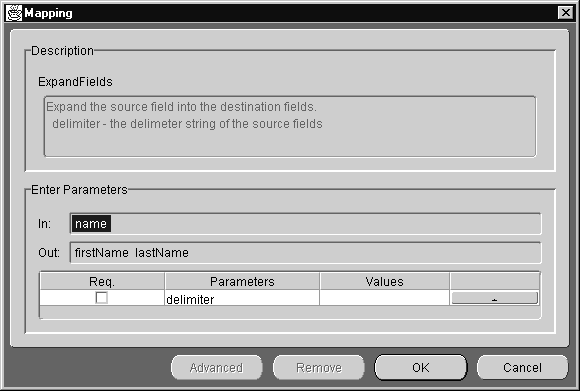
Text description of the illustration is35.gif
In the Parameters field, enter the values for the transformation parameters. For example, a blank value indicates a value for the separator parameter.
- Click Next.
- Define Mapping OUT Arguments Page
Mapping arguments involves copying the individual fields or simple shape-change transformations. Use this page to map the common view return arguments to the application view return arguments.
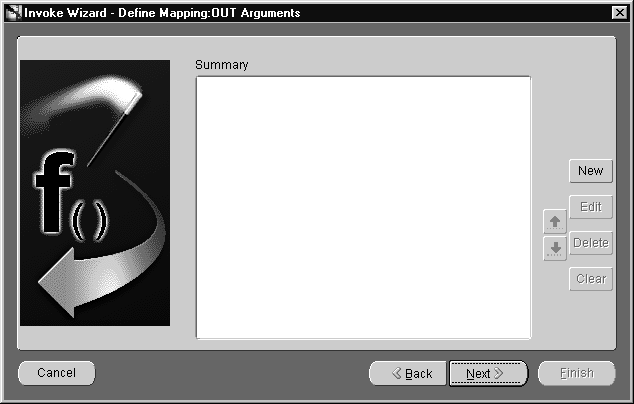
Text description of the illustration is13.gif
- Click New to define mappings.
- Click Finish.
Implementing a Procedure
Implementing a procedure in iStudio involves using the Implement Wizard. To start the Implement Wizard:
- In the Design Navigation tree, expand the Application node. Select and expand the Application node to display the Implemented Procedures leaf. Right-click Implememted Procedures and select Implement. The Implement Wizard displays:
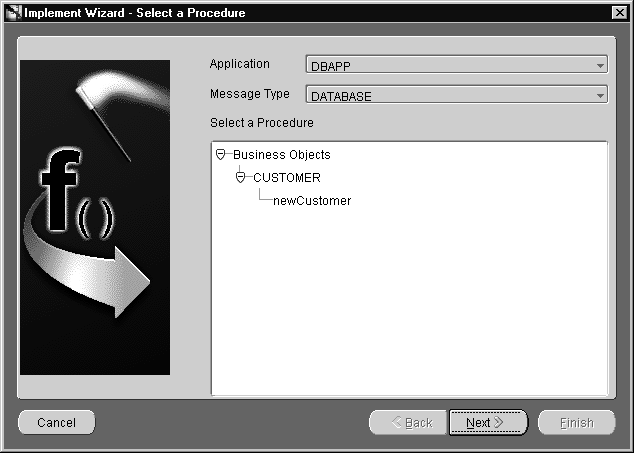
Text description of the illustration is15.gif
Use this page to select a procedure to implement.
- Select information for the following fields:
- Application--The name of the application implementing the procedure. Select an application from the drop down list.
- Message Type--This field specifies the mode of communication between Oracle9iAS InterConnect and the application. Select from the following message types:
-
Database--Oracle9iAS InterConnect communicates with the application using the database.
-
Generic--Oracle9iAS InterConnect communicates with the application using a user-defined bridge.
-
XML--Oracle9iAS InterConnect communicates with the application using XML data described through a DTD using the FTP, SMTP, HTTP, MQ Series, or user-defined adapters.
-
AQ--Oracle9iAS InterConnect communicates with the application through Oracle Advanced Queues using the Advanced Queue adapter. The payload can be Oracle Objects where fields may be XML or RAW XML.
-
D3L--The adapter communicates with the application using D3L.
- Select the procedure to invoke.
- Click Next.
- Define Application View Page
After selecting the procedure to implement, the Define Application View page displays:
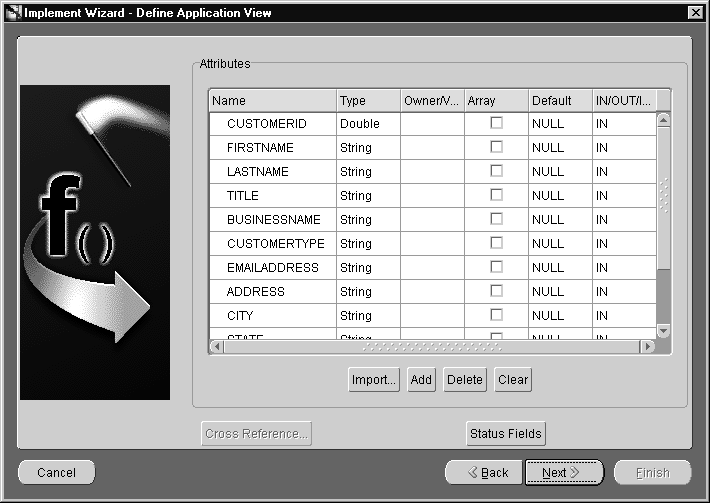
Text description of the illustration is16.gif
Initially, this page is an empty table, used to define the application view. Attributes can be defined by using Add. Attribute definitions can be imported from a database or an API Repository by using Import.
- Add or import attributes by clicking Add or Import.
- Click Cross Reference... to populate cross reference tables.
- Click Next.
- Define Mapping IN Arguments Page
Mapping may involve copying individual fields, or simple shape-change transformations. After clicking next on the Define Application View page, the Define Mapping IN Arguments page displays:

Text description of the illustration is18.gif
Use this page to define mapping IN arguments.
- Click New to define mappings.
- Click Next.
- Define Mapping OUT Arguments Page
After clicking Next on the Define Mapping IN Arguments page, the Define Mapping OUT Arguments page displays:
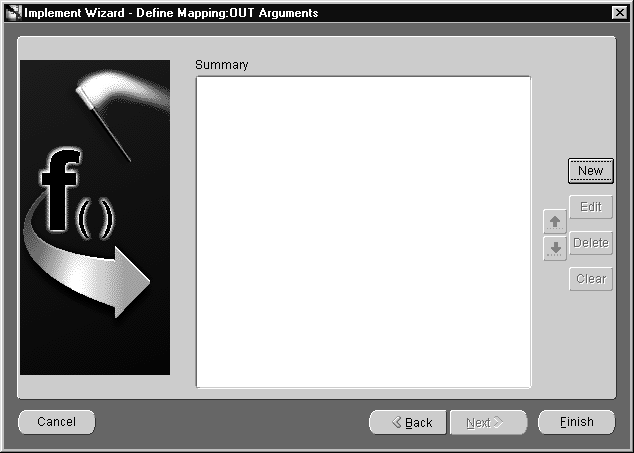
Text description of the illustration is19.gif
Use this page to define mapping OUT arguments.
- Click New to define mappings.
- Click Next.
- Define Stored Procedure Page
After clicking Next on the Define Mapping OUT Arguments page, the Define Stored Procedure page displays:
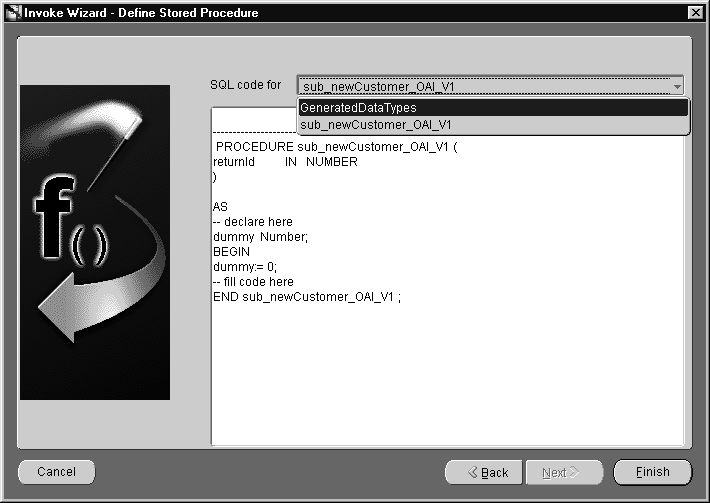
Text description of the illustration is14.gif
If the message type selected was database, the data is received by a stored procedure. In this stored procedure, the action performed when the values are returned to the application can be specified. The adapter invokes the stored procedure at runtime with the appropriate data.
The following arguments will be returned:
- All OUT arguments.
- All IN arguments specified to be returned as part of the reply.
- Select a generated procedure from the SQL code for drop down list.
- Click Finish.
Exporting Stored Procedures
iStudio generates stored-procedure stubs to enable an application to interface with the Oracle9iAS InterConnect run-time easily. These stubs are exported to a file using the export functionality.
To export stored procedures:
- Select File from the menu bar, then select Export. The Export Application dialog displays:
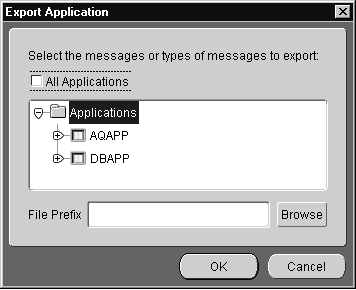
Text description of the illustration ai-isd312s.gif
- Select the messages to export stored procedures. Messages can be filtered as follows:
- Export all messages--Select Applications at the top of the directory.
- Export all messages of a certain type for all applications--Check All Applications, then select one or more types of messages to export.
- Export all messages for a specific application--Select the application name.
- Export all messages of a certain type for a specific application--Select the type under the application name in the directory.
- To export specific messages--Select the messages by name. To select more than one message or class of messages click the application.
- Enter the name of the file to contain the exported stored procedures in the File Prefix field. The name generates multiple files.
To view the directory page, click Browse.
- Click OK. The stored procedure is now exported.
