Release 2 (9.0.3)
Part Number B10062-01
Home |
Solution Area |
Contents |
Index |
| Oracle9iAS TopLink Tutorials Release 2 (9.0.3) Part Number B10062-01 |
|
In the introductory tutorial, you will create mappings from a simple database application using TopLink Mapping Workbench. You will learn how to:
By the end of the tutorial, you will be able to store data from a Java class into a relational database and access existing database information from Java classes.
This tutorial project will manage the employee database at the ACME Leisure Company. The system tracks each employee's name, address, and phone number.
The system use these classes:
Employee - Represents both full-time ACME employees and temporary contractors working on ACME projects. It includes the employee's personal information as well as references to his or her home address and phone numbers.
Address - Represents the employee's home address. The class contains country, street, city, province, and postal code information.
PhoneNumber - Contains the telephone number(s) for each employee and contractor (number, area code, and type information). The class also includes a reference to the employee who owns the phone number.
The following figure illustrates the object model for this system.

The ACME employee system stores the employee data in three database tables. To use this tutorial, create these tables in your database application.
| Column name | Column type | Details |
|---|---|---|
|
EMP_ID |
NUMERIC(15) |
Primary key |
|
NAME |
VARCHAR(40) |
|
|
ADDRESS_ID |
NUMERIC(15) |
|
| Column name | Column type | Details |
|---|---|---|
|
ADDRESS_ID |
NUMERIC(15) |
Primary key |
|
COUNTRY |
VARCHAR(80) |
|
|
STREET |
VARCHAR(80) |
|
|
CITY |
VARCHAR(80) |
|
|
PROVINCE |
VARCHAR(80) |
|
|
P_CODE |
VARCHAR(20) |
|
| Column name | Column type | Details |
|---|---|---|
|
EMP_ID |
NUMERIC(15) |
Primary key |
|
AREA_CODE |
CHAR(3) |
|
|
P_NUMBER |
CHAR(7) |
|
|
TYPE |
VARCHAR(15) |
Primary key |
After creating these ACME database tables, you are ready to begin the tutorial.
TopLink Mapping Workbench stores project information in the .mwp file and associated folders. You should always start a Mapping Workbench project in a new folder.
The splash screen appears, followed by the TopLink Mapping Workbench screen.

 in the toolbar or select File > New Project from the menu. The Create a New Project window appears.
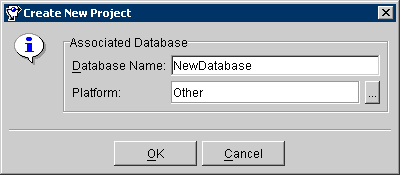
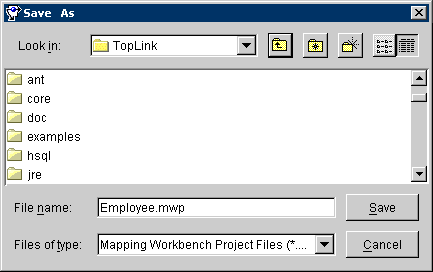
Employee.mwp.

 in the toolbar or select File > Save to save the project.
Each TopLink project uses a classpath - a set of directories, .jar files, and .zip files - when importing Java classes and defining object types.
Employee project in the Project Tree pane.
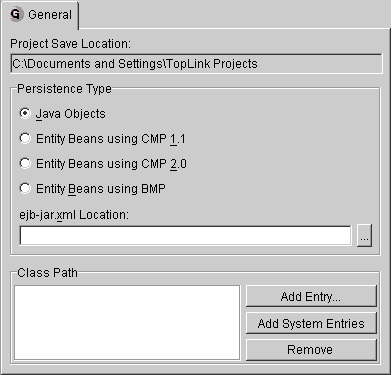

<INSTALL_DIR>\tour\lib\tl_demo.jar directory and click on Add.
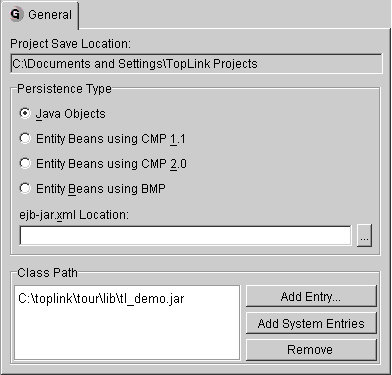
 in the toolbar or select File > Save to save the project.
The Employee model uses three classes:
Employee class has a name attribute and privately owned PhoneNumber and Address relationships
PhoneNumber class has attributes describing the phone number information and a relationship that describes the owner of the PhoneNumber
Address class has attributes describing the employee's mailing address
You must enable the Employee, PhoneNumber, and Address classes (provided in the oracle.toplink.demos.employee.domain package) for this tutorial, as described in "Generating the Class Definitions".
The following table shows how the classes relate to the database tables.
The following code example illustrates providing accessor methods.
// addPhoneNumber method of the Employee class allows the phoneNumber to set a
reference to the Employee that owns it.
public void addPhoneNumber(PhoneNumber phoneNumber)
{
   getPhoneNumbers().addElement(phoneNumber);
   phoneNumber.setOwner(this);
}
You must generate a TopLink descriptor for each Java class in the project.
Employee project.
 or select Selected > Add/Update Classes from the menu. The Select Classes screen appears.
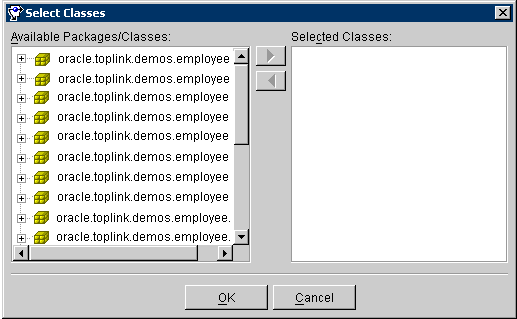
oracle.toplink.tutorials.intro package. Click on the plus sign (
 ) to expand that package (or double-click on the name to expand the package).
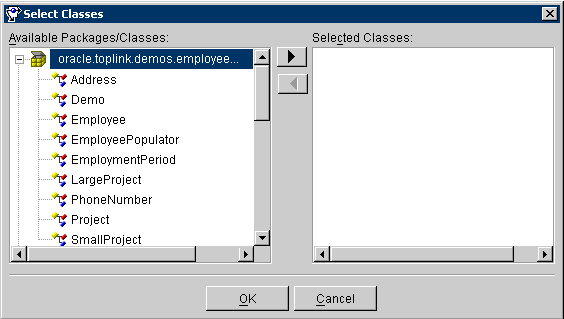
Address class, and click the
 button or double-click on the class.
TopLink copies the Address class to the Selected Classes pane.
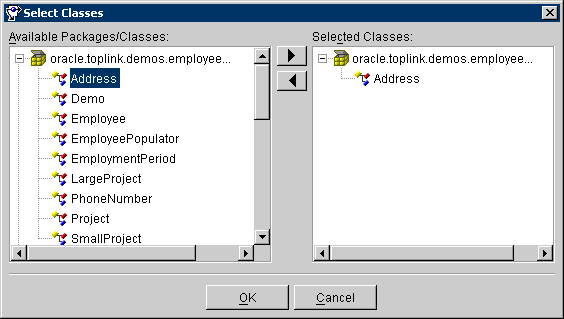
Employee and PhoneNumber classes in that package. (Or, highlight both classes using Shift+click or Ctrl+click as necessary, and click the
 button once to import all of the remaining classes.)
The descriptors and their attributes appear in the Project Tree pane on TopLink Mapping Workbench screen.

User-interface elements called out in Figure 1-12:
 or select File > Save from the menu.
You can enter database table information directly from TopLink Mapping Workbench or import the tables from the database. You must log into the database to obtain the table information and to generate table files.
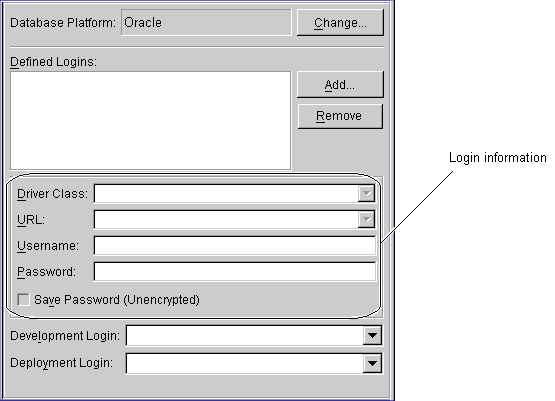
 or select Selected > Login from the menu. The database icon changes to
 .
.
If TopLink Mapping Workbench is unable to connect to the database, contact your database administrator to ensure that the database login parameters have been entered correctly and your JDBC driver has been installed correctly. If problems persist, test your driver connectivity. See the Oracle9iAS TopLink Troubleshooting Guide for details.
You can enter database table information (as specified in "Creating the Database Schema") directly from TopLink Mapping Workbench or import the tables from the database.
Use this procedure to create the database tables from the TopLink Mapping Workbench.
Use this procedure to use the Mapping Workbench to create table definitions. Later you can create the actual tables on the database.
 or right-click on the database in the project tree pane, and choose Add New Table. The New Table dialog box appears.
ADDRESS for the table name, and click OK.
ADDRESS table. Refer to the tables in "Creating the Database Schema" for the correct field information. Be sure to indicate the primary key(s) for each table.
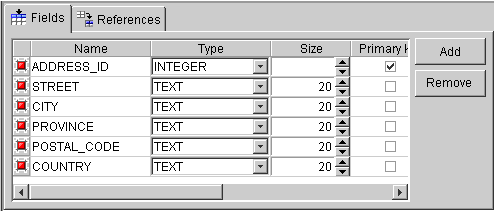
 or select File > Save from the menu.
Repeat this procedure for the EMPLOYEE and PHONE tables.
After defining the tables in TopLink Mapping Workbench, you can automatically create the tables on the database.
If the Confirm Replace window appears, it means that an existing table on the database has the same name. Check with your database administrator before replacing any table.
The existing table may have been created:
or
The system displays a message indicating that the three tables were created.
 or select Selected > Log Out from the menu.
 or select File > Save from the menu.
Continue with "Mapping Classes and Tables in the Descriptor".
Use this procedure if you have already created tables in your database and want to import these tables directly into the Mapping Workbench.
 or select Selected > Login from the menu.
 or right-click on the database choose Add/Update Existing Tables From Database from the pop-up menu.
The Import tables from database window appears.

User-interface elements called out in Figure 1-15:
ADDRESS table in the Available Tables pane and then click the
 button. The
 ADDRESS table moves to the Selected Tables pane.
EMPLOYEE and PHONE tables.
 or select Selected > Log Out from the menu.
 or select File > Save from the menu.
Continue with "Mapping Classes and Tables in the Descriptor".
When you create a new project and generate class definitions, TopLink Mapping Workbench automatically creates descriptors. However, these descriptors do not contain any information about how the classes are associated with the tables. This section describes how to store associations in a descriptor, which can then be used by a Java application to make the classes persistent.
This section contains procedures to map the classes to tables for the ACME project. After the mapping the descriptors, you can access the database from a Java application.
The TopLink mapping describes the way an attribute is stored in, and retrieved from, a database. For example, the name attribute of the Employee class maps to the NAME column of the EMPLOYEE table.
A descriptor stores the class-to-table mappings for a class. TopLink Mapping Workbench stores the descriptors in XML files in the Descriptor directory. At run time, TopLink creates instances of the Descriptor class for each of the descriptor files and stores them in a database session.
Address descriptor from the Project Tree pane.
Address table.
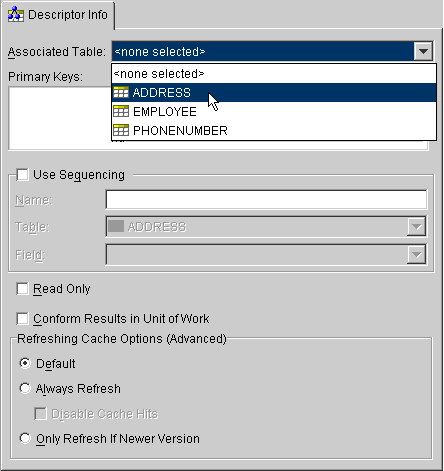
 or select File > Save from the menu.
Although you have mapped the descriptors to specific database tables, the class attributes have not yet been mapped to the tables' columns. You will map the attributes later in this tutorial.
A table's primary key is the field (or fields) used to uniquely identify its records. The PHONE table has a compound primary key (EMP_ID and TYPE fields).
Database tables often use a sequence number as the primary key. Sequence numbers are sequential, artificially-generated fields, outside of the problem domain, that uniquely identify a record. TopLink supports sequence numbers through the database's native support, such as in Oracle and Sybase, or by maintaining a sequence table. If sequence numbers are enabled for a class, they are generated and incremented whenever an object is inserted into a database.
ADDRESS database table.
ADDRESS_ID column is selected as a Primary Key.
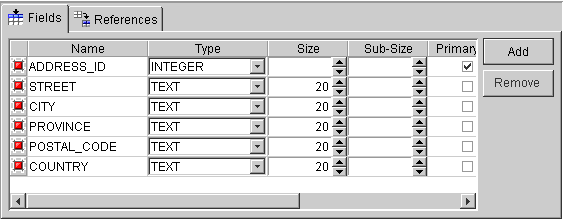
 or select File > Save from the menu.
The ACME system uses sequence numbers for the EMPLOYEE and ADDRESS tables. You must explicitly create a sequence table, then apply it to your project.
 or by right-clicking on the Database in the Project Tree and choosing Login from the pop-up menu.
 . The New Table dialog box appears.

SEQUENCE.
SEQ_NAME field as the primary key.

 or select File > Save from the menu.
The Address class does not reference any other classes. Its attributes map directly to database fields as a direct-to-field mapping.
Address descriptor in the Project Tree pane.
city attribute.
 in the mapping toolbar. The Direct-to-Field mapping tab appears in the Properties pane.
CITY field.
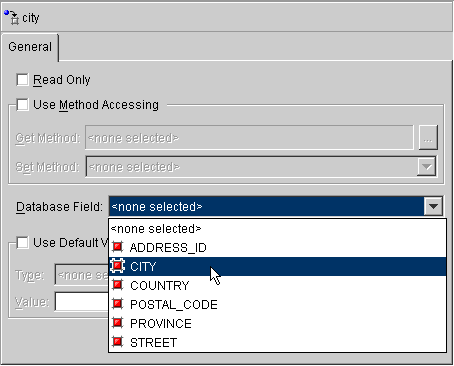
ADDRESS table.
 or select File > Save from the menu.
The Address and Employee classes use non-native sequencing for primary keys.
ACME_ADDRESS and use the drop lists to choose the Table and Field, as in Figure 1-22.
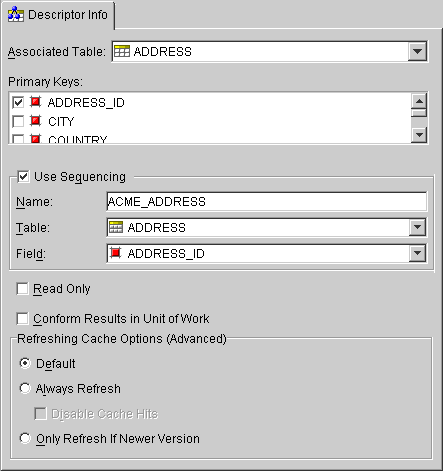
 or select File > Save from the menu.
Employee class. Use ACME_EMPLOYEE as the Name, and choose EMPLOYEE and EMP_ID from the Table and Field drop-down lists, respectively.
 or select File > Save from the menu
When the descriptors are registered with a database session, this information is entered into the SEQUENCE table. The session tracks the sequencing information.
In the Employee class, the name and id attributes map directly to the EMPLOYEE table columns. The phoneNumbers and address attributes refer to other Java classes rather than referring directly to columns in the database.
name attribute as direct-to-field to the NAME field.
id attribute as a direct-to-field mapping to the EMP_ID field (the primary key).
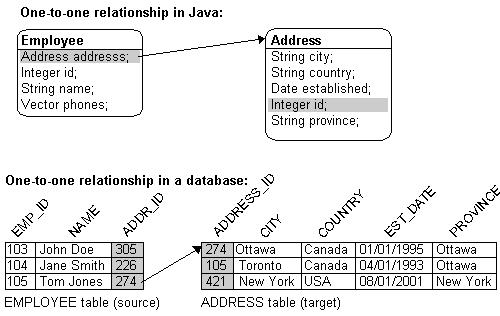
There is only one home address associated with each employee, so the address attribute requires a one-to-one mapping with the Address class. Figure 1-23 illustrates a sample one-to-one mapping.
address attribute in the Project Tree pane, then click the One-to-one Mapping button
 in the mapping toolbar.
The Properties pane displays the appropriate information for a one-to-one relationship to be specified.
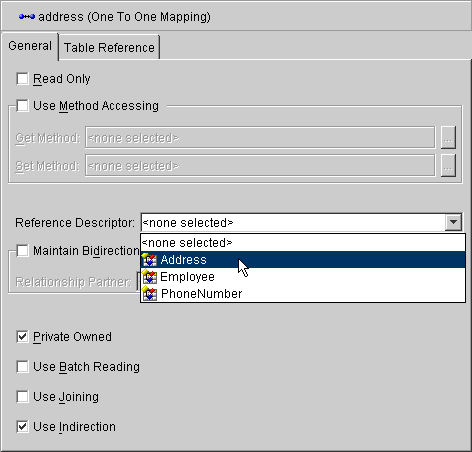
This allows the Address object to be created, updated, or deleted automatically when the Employee owning it is changed.
Address as the reference descriptor.
One-to-one mappings use the relational database concept of foreign keys to access other classes stored in the database. You must specify the foreign key information in the descriptor so that TopLink knows how to search for a referenced object, as illustrated in Figure 1-23.
Select the On Database option if you want to create the reference on the database when you create the tables. TopLink doesn't require that you actually have the constraint on the database, but you may wish to do this for other reasons. Consult your database administrator for more information.
EMPLOYEE_ADDRESS from the Table Reference drop-down list.
 or select File > Save from the menu.
To map an attribute to a Java collection such as a Vector, the application must make a one-to-many mapping for the class owning the collection, and a one-to-one mapping back from the class being referenced. The one-to-one mapping in the referenced class is implemented as a foreign key to the source class.

In this tutorial, the Employee project requires:
phoneNumbers attribute of the Employee class to the PhoneNumber class
owner attribute of the PhoneNumber class back to the Employee class
Employee class in the Project tree pane.
phoneNumbers attribute.
 in the mapping toolbar. The Properties pane changes to allow the appropriate information for a one-to-many relationship to be specified.
PhoneNumber.

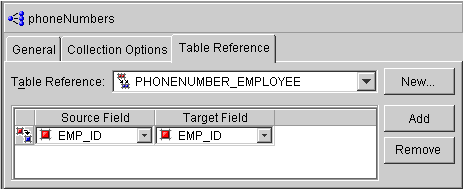
PHONE_EMPLOYEE with a source table of PHONE and target table of EMPLOYEE and click on OK.
PHONE_EMPLOYEE.
EMP_ID and the Target (primary key) field to EMP_ID.
 or select File > Save from the menu.
After mapping the Employee descriptor, use this procedure to map the one-to-one back reference:
owner attribute of the PhoneNumber descriptor as a one-to-one mapping to the Employee class (refer to "Creating One-to-one Mappings Between Objects").
EMPLOYEE as the Reference Descriptor.
Phone descriptor as direct-to-field mappings (refer to "Implementing Direct-to-field Mappings").
Employee descriptor. Right-click on the attribute and select Remove from the pop-up menu.
You can also remove attributes by selecting Selected > Remove from the menu.
A database session in TopLink for Java represents an application's dialog with a relational database. The DatabaseSession class keeps track of the following information:
An application uses the session to log in to the database and perform read and write operations on the objects stored therein. The session's lifetime is normally the same as the lifetime of the application.
A test class has been included with TopLink so that you can test the descriptor mappings that you have created for this introductory tutorial. This class, Demo, among other things, tests the validity of the descriptors and logs into the database.
To log into a database, an application must first read the project file into a Project instance. The Project creates the DatabaseSession and connects through login. The code fragment in the following Example 1-2, "Logging in and Creating a Project Example Code" illustrates this approach.
The following code example illustrates creating the EMPLOYEE project.
...
   import oracle.toplink.sessions.*;
   ...
   Project builderProject = oracle.toplink.tools.workbench.
   XMLProjectReader.read("C:\\toplink\\tutorials\\intro\\Employee.xml");
   DatabaseSession session = builderProject.createDatabaseSession();
   session.login(); // or, session.login(userName, password);
   ...
See the loginToDatabase() method, in the Demo class, for a complete method.
You can use TopLink Mapping Workbench to create database tables. TopLink can also create tables using the SchemaManager class. To use this method of creating tables, you must have already obtained a valid login.
The following examples illustrates how to create the EMPLOYEE table after having logged in to the database. The method createTables() on the Demo class contains sample code that uses the schema manager to create all the required tables for the introductory tutorial.
The following code example illustrates creating the EMPLOYEE table.
import oracle.toplink.tools.schemaframework.*;
   import java.math.*;

   // Create table definition which supplies information about the table to be
   created.
   TableDefinition employeeTable = new TableDefinition();
   employeeTable.setName("EMPLOYEE");
   employeeTable.addIdentityField("EMP_ID", BigDecimal.class, 15);
   employeeTable.addField("NAME", String.class, 40);
   employeeTable.addField("ADDRESS_ID", BigDecimal.class, 15);

   // Create the table in the database.
   SchemaManager schemaManager = new SchemaManager(session);
   schemaManager.replaceObject(employeeTable);

   // Create an empty table named SEQUENCE if it is not already there. This is
   used to hold the sequence number information such as name and counter.
   schemaManager.createSequences();
After creating the descriptor files, you must write Java code to register the files with the TopLink session. After registering the files, the application can read and write Java class instances from the database.
A transaction is a set of database operations that can either be committed (accepted) or rolled back (undone). Transactions can be as simple as inserting an object into a database, but also allow complex operations to be committed or rolled back as a single unit. Unsuccessful transactions can be discarded, leaving the database in its original state.
A unit of work is an object that simplifies the transaction process and stores transaction information for its registered persistent objects. The unit of work enhances database commit performance by updating only the changed portions of an object. Units of work are the preferred method of writing to a database in TopLink.
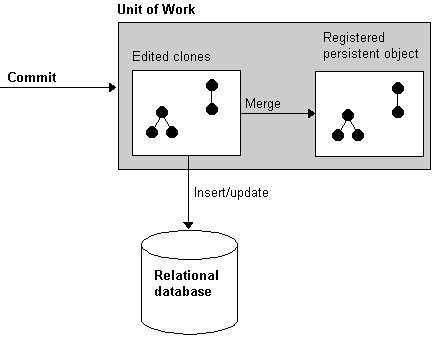
To use a unit of work, create an instance of UnitOfWork and register the desired persistent objects. The registering process returns clones that can be modified. After changes are made to the clones, use the commit() method to commit an entire transaction. The unit of work inserts new objects or updates changed objects in the database, as illustrated in Figure 1-29.
If an error occurs when writing the objects to the database, a DatabaseException is thrown and the unit of work is rolled back to its original state. If no database error occurs, the original objects are updated with the new values from the clones.
Sessions can read instances from the database using the readObject() method. Database sessions can write instances to the database using the writeObject() method, but note that write is neither required nor used when using a unit of work. An application typically uses the session to read the instances of a given class from the database and determines which of the instances require changes. The instances requiring changes are then registered with a unit of work. After the changes have been made, the unit of work is used to commit only the changed objects to the database.
This model provides the optimum performance for most applications. Read performance is optimized by using the session because the unit of work does not have to keep track of objects that do not change. Write performance is optimized because the unit of work keeps track of transaction information and writes only the changed portions of an instance to the database.
After the descriptors have been registered with the session, you are ready to read and write objects to the database. Objects are registered with a unit of work and then committed to the database.
The code fragment in the following example is a continuation of the fragment in "Logging into a Database", Example 1-3 and uses the session created there.
The following code example illustrates using a unit of work to write an object.
//Create an Employee object for the company president, as well as the associated
personal information objects.
Employee president = new Employee();

Address presidentHome = new Address();
presidentHome.setStreet("601-1140 Meadowlands Dr.");
presidentHome.setCity("Ottawa");
presidentHome.setPostalCode("K2E 6J6");
presidentHome.setProvince("ON");
presidentHome.setCountry("Canada");

PhoneNumber homePhone = new PhoneNumber();
homePhone.setType("Home");
homePhone.setAreaCode("555");
homePhone.setNumber("555-1234");

PhoneNumber businessPhone = new PhoneNumber();
businessPhone.setType("Business");
businessPhone.setAreaCode("555");
businessPhone.setNumber("555-5678");

president.setName("John Smith");
president.setAddress(presidentHome);
president.addPhoneNumber(homeNumber);
president.addPhoneNumber(businessPhone);

//Register objects with a new unit of work. Registered objects will return a
clone which should be used to make changes to the object.
UnitOfWork unitOfWork;
unitOfWork = session.acquireUnitOfWork();
Employee tempPresident = (Employee)unitOfWork.registerObject(president);

//Register any other objects, or change registered objects.
tempPresident.setName("Johnny Smith");

//Commit the objects to the database.
unitOfWork.commit();
To change the information in the database, the application must create an Expression that contains information about the query to be made. The session then searches the database for an object that matches the query and returns the instance. The returned object is registered with the unit of work and the application makes changes to the object. The application then commits the change to the database using the commit() method.
The following code example illustrates using a session to read an object.
//Import the Expression classes.
import oracle.toplink.expressions.*;

//Import the other classes. Create a session and login. Create a query
expression to find the database object.
ExpressionBuilder builder = new ExpressionBuilder();
Expression expression = builder.get("name").equal("John Smith");

//Read the object from the database using the query expression.
Employee president = (Employee) session.readObject(Employee.class, expression);

//Register the object with a new unit of work.
UnitOfWork unitOfWork = session.acquireUnitOfWork();
Employee tempPresident = (Employee)unitOfWork.registerObject(president);

//Make the change to the object.
tempPresident.setName("Johnny Smith");

//Commit the change to the database. Only the NAME field is actually updated.
unitOfWork.commit();
This tutorial explained the basic steps required to create a Java project that accesses a relational database through TopLink. The main concepts explained include:
|
|
 Copyright © 2002 Oracle Corporation. All Rights Reserved. |
|