Version 9.0.2
Part Number A90880-01
Home | Solution Area | Contents |
Index |
| Oracle9iAS Discoverer Plus Tutorial Version 9.0.2 Part Number A90880-01 |
|
It will probably take you about 30 minutes to complete this lesson.
In previous lessons, you used Discoverer to retrieve and analyze sales data. Once you have created reports, you typically want to share the reports with other Discoverer users or other organizations.
In this lesson you will learn how to use Discoverer to print and export worksheets, and share worksheets with other Discoverer users.
This lesson consists of the following exercises:
In this exercise you will learn how to print worksheet data. Discoverer provides the Print Wizard to take you step-by-step through the printing process. You will print a worksheet in the Video Tutorial Workbook to show data for the year 2000.
To print a worksheet:
Hint: See Lesson 1: "Exercise 1: Starting Discoverer Plus" and "Exercise 2: Opening the tutorial workbook".

In this example, you only want to print data for the year 2000.
Hint: If you wanted to print data for all years available, you would select 'All' from the Year drop down list in the Page Items area, or pivot the Year item to the body of the worksheet so that data for all years was displayed on the worksheet.

The Print Wizard: Select Objects dialog enables you to select which worksheets to print. In this case, you want to print the current worksheet only.
Notice that the Table/Crosstab only radio button is selected by default. This is because the tutorial workbook does not contain graphs.
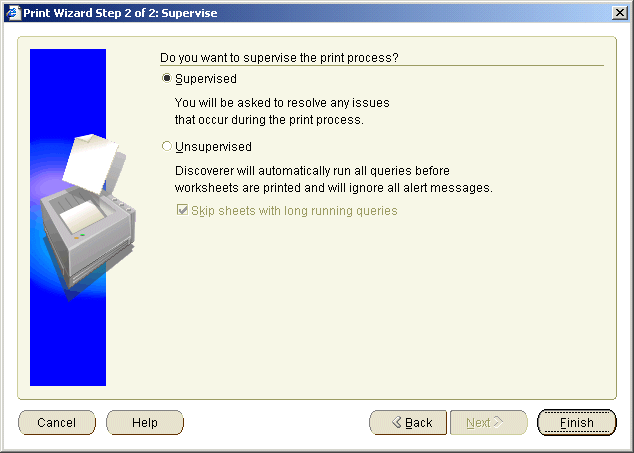
The Print Wizard: Supervise dialog enables you to choose whether to monitor the printing process.
To make sure that the most current data is printed, Discoverer refreshes the worksheet before printing it to make sure that the worksheet contains up-to-date data. Sometimes issues arise during the printing process (e.g. the query used to generate the report might exceed the maximum recommended time). You can specify whether you want to resolve such issues, or whether you want Discoverer to ignore them.
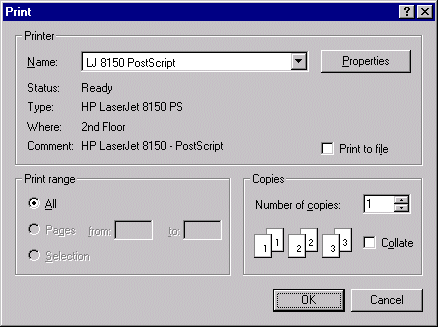
In this exercise you have learned how to print worksheets in Discoverer. Now you are ready to learn how to export Discoverer worksheets to other popular application formats.
In this exercise you will learn how to export worksheet data to Microsoft Excel format.
You might want to share Discoverer data with people or organizations that do not have Discoverer. For example, they might have the Microsoft Excel spreadsheet package. Discoverer enables you to export worksheets in a range of commonly used application formats. Discoverer provides you with the Export Wizard to take you step-by-step through the export process. You will export a worksheet in the Video Tutorial Workbook tutorial workbook to Microsoft Excel format.
To export to Microsoft Excel format:

The Export Wizard: Select Objects dialog enables you to select which worksheets to export.
Notice that the Table/Crosstab only radio button is selected by default. This is because the tutorial workbook does not contain graphs.
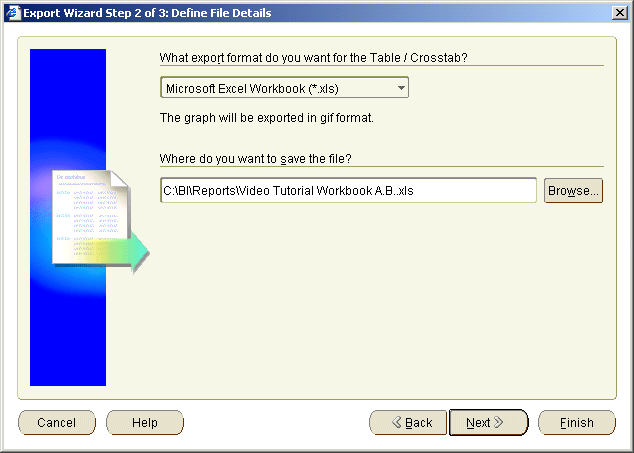
The Export Wizard: Define File Details dialog enables you to select the export format and target location of the export file.
Notice that you can also export to many other formats, including Text (*.txt), CSV (*.csv), and Formatted Text (*.prn).
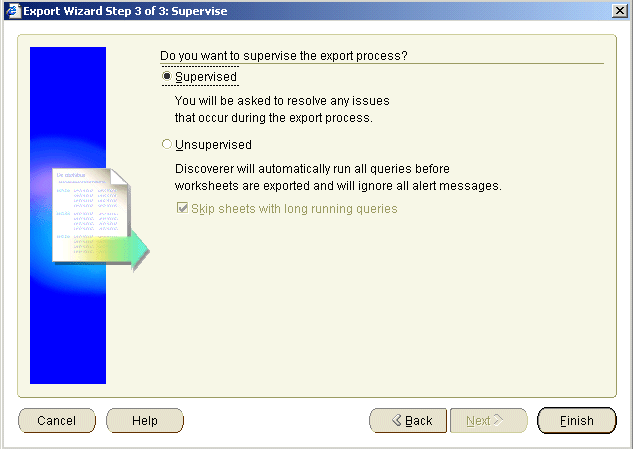
The Export Wizard: Supervise dialog enables you to choose whether to monitor the export process.
To make sure that the most current data is printed, Discoverer refreshes the worksheet before printing it to make sure that the worksheet contains up-to-date data. Sometimes issues arise during the printing process (e.g. the query used to generate the report might exceed the maximum recommended time). You can specify whether you want to resolve such issues, or whether you want Discoverer to ignore them.
Discoverer exports the worksheet to Excel format and saves it in the location you specified.
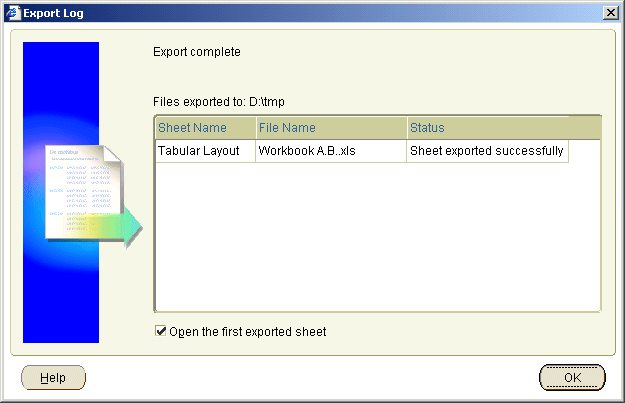
The Export Wizard: Export Log dialog shows you which export files were produced and whether any issues arose during the export.
If you have Microsoft Excel installed on your computer and previously selected the Open the first exported sheet? check box, the exported worksheet is displayed in a Microsoft Excel spreadsheet.
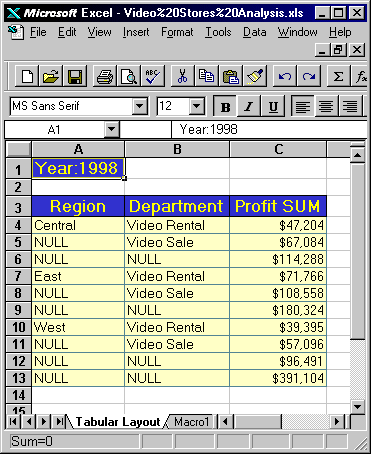
If you did not previously select the Open the first exported sheet? check box, run the Microsoft Excel application and open the export file.
In this exercise you have learned how to export Discoverer data to Microsoft Excel format. Now you are ready to learn how to share Discoverer worksheets with other Discoverer users.
The exported worksheet is displayed in a Web browser (see figure below).
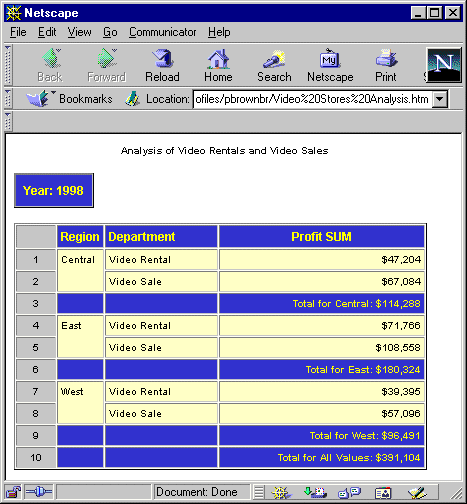
In this exercise you will learn how to enable other Discoverer users to access your workbooks using Discoverer Plus or Discoverer Viewer.
When you give other Discoverer users access to workbooks, you can do one of the following:
In this exercise, you will give access to all users using a public user ID called 'Public'.
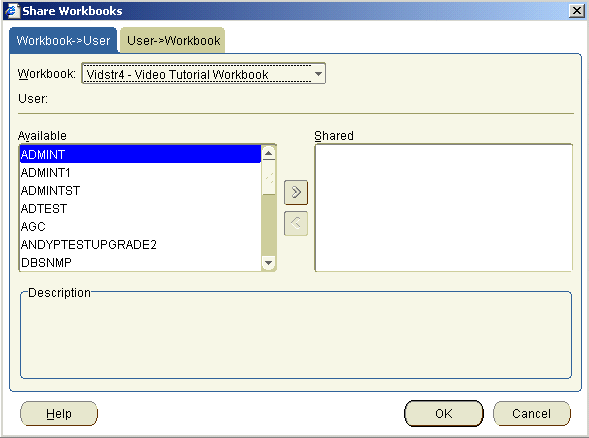
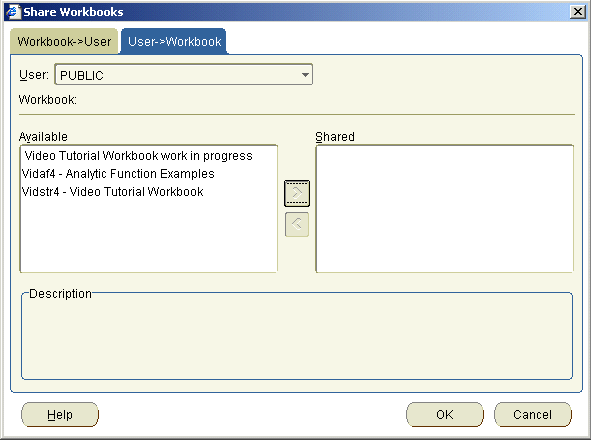
You have now shared the Video Tutorial Workbook workbook with other Discoverer users in your organization who are part of the PUBLIC role. Every time you update the workbook, public users will get the most current version.
As you can see, Discoverer provides you with a wide range of options for sharing your results with others. In this lesson you:
Congratulations on completing the tutorial!
Now that you have learnt the basic Discoverer concepts, you can use your new skills to now go on to explore Discoverer's full range of analysis tools.
Remember, if you have questions about using the product, use Discoverer's online Help and context-sensitive Help buttons.
|
|
 Copyright © 2002 Oracle Corporation. All Rights Reserved. |
|